When it comes to protecting your roofline and ensuring your home looks neat, fascias play a crucial role. A fascia board runs along the lower edge of your roof, holding the gutters in place and shielding the roof’s interior from weather damage. Proper fascia installation not only improves the appearance of your house but also strengthens the overall structure of your roofing system.
Benefits of Installing Fascias
Protection from Weather
Fascias act as a barrier between the elements and your home’s roofing. They protect the rafters and roof edges from rain, wind, and moisture, reducing the chances of rot and long-term damage.
Gutter Support
Your gutters rely on strong fascia boards for stability. A well-installed fascia ensures rainwater flows properly through the gutter system without leaks or sagging.
Improved Aesthetic
Fascias give the roofline a finished look. Whether you choose timber, uPVC, or composite materials, fascias enhance your home’s curb appeal while adding to its value.
Choosing the Right Fascia Material
Timber Fascias
Wooden fascias have a traditional look and are easy to paint or stain. However, they require regular maintenance to prevent rot, warping, and insect damage.
uPVC Fascias
uPVC (plastic) is a popular modern choice. It’s durable, low-maintenance, and resistant to rot. Available in different colors and finishes, uPVC fascias can complement any home style.
Composite Fascias
Made from a blend of materials, composite fascias combine durability with the aesthetic appeal of timber. They often come at a higher price point but require minimal upkeep.
Preparing for Fascia Installation
Before installation begins, it’s essential to inspect the roofline. Any damaged rafters or soffits should be repaired or replaced. You should also remove the old fascia boards carefully, ensuring that the guttering system is temporarily supported.
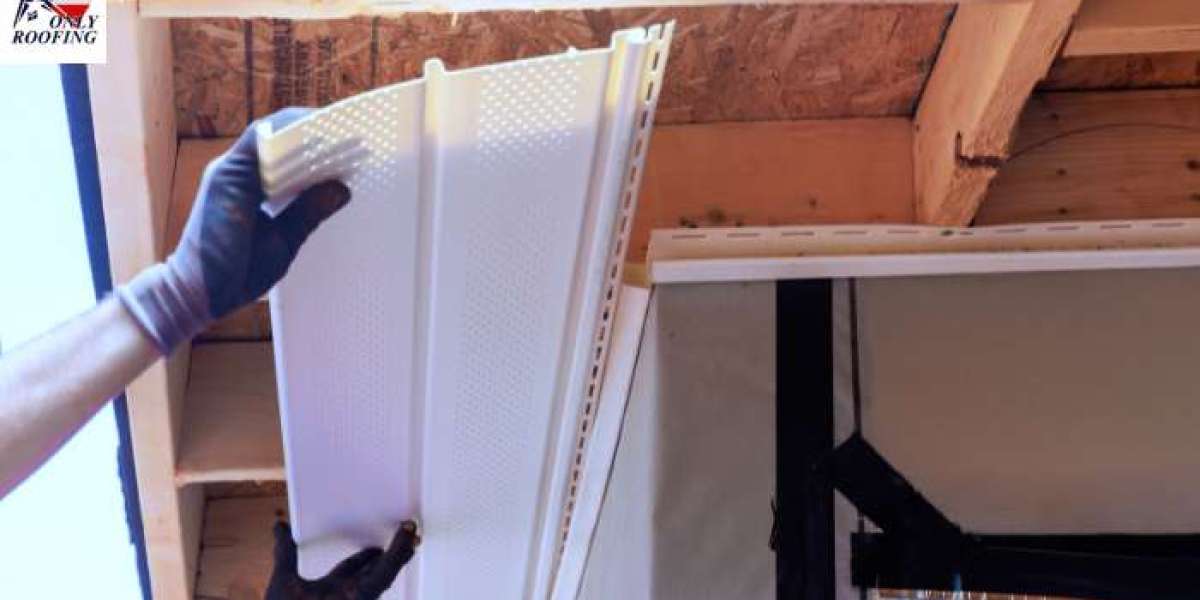
Step-by-Step Fascia Installation
Step 1: Remove Old Fascias
Take down the existing boards, nails, and fittings. Check the rafters for signs of decay and repair them if necessary.
Step 2: Measure and Cut New Boards
Measure the length of your roofline and cut the fascia boards to size. Precision is key to achieving a seamless finish.
Step 3: Secure the Fascia Boards
Fix the new fascias directly to the rafter ends using strong nails or screws. Ensure they are straight and aligned with the roofline for both function and appearance.
Step 4: Install Soffits
Once fascias are in place, attach soffit boards underneath to provide ventilation and extra protection to the rafters.
Step 5: Reattach Guttering
Carefully reinstall the guttering system to the new fascia boards, making sure it slopes correctly for proper drainage.
Common Mistakes to Avoid
Failing to check for rotten rafters before installing fascias.
Using the wrong type of fasteners, leading to instability.
Incorrectly aligning the boards, causing water leakage and gutter issues.
Choosing low-quality materials that won’t withstand long-term exposure.
Maintenance Tips for Fascias
Clean your gutters regularly to prevent overflow and damage to the fascia boards.
Inspect the boards once or twice a year for cracks, peeling paint, or warping.
Repaint or reseal timber fascias as needed to extend their lifespan.
Wash uPVC fascias with mild soap and water to keep them looking fresh.
Conclusion
Fascia installation is a vital part of maintaining your home’s roofing system. By choosing the right materials and following proper installation steps, you can ensure long-lasting protection and improved curb appeal. Whether you prefer the timeless look of timber or the durability of uPVC, correctly installed fascias will support your guttering, protect your roof, and enhance the overall value of your property. With proper care and occasional maintenance, fascias can serve your home well for decades. Visit our official website of onlyroofing.com