An RV lithium upgrade often changes the shape or location of the house bank. The old cables may reach the new terminals, but reach alone is not a design check. Their length, size, protection and route through the vehicle determine how the installation behaves under a large inverter load and during travel.
Trace every high-current path
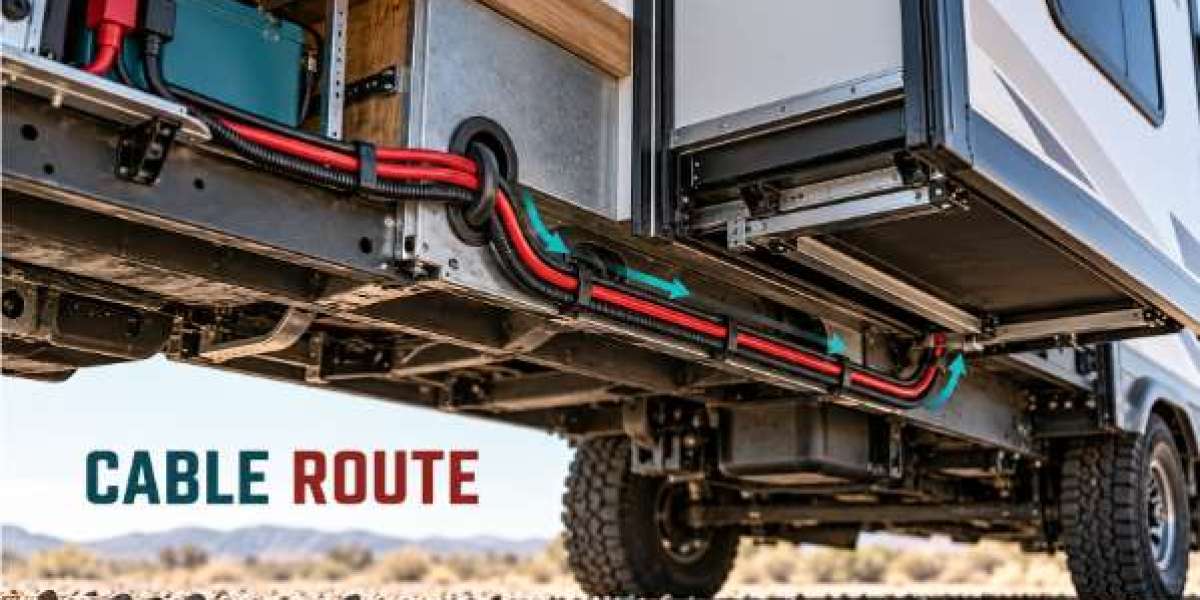
Start at the battery and draw the positive and return paths to the inverter, busbars, fuse panel and charging equipment. Measure the actual routed distance, including detours around tanks, cabinetry and structural members. A straight line on a sketch can understate the cable length. A circuit calculation includes the return path as well.
List the highest expected current for each branch. A 12V inverter serving a large AC appliance can demand substantial battery-side current. Cable and fuse selection must follow the equipment instructions and applicable installation requirements. A qualified installer can calculate allowable voltage drop and temperature rise for the route.
Keep the main path serviceable
- Locate the main fuse and disconnect where they can be reached.
- Protect cables at metal edges and panel penetrations.
- Secure runs so vibration does not rub insulation over time.
- Leave appropriate bend space at terminals and busbars.
- Separate routes from moving parts and unsuitable heat sources.
- Label both ends before closing panels.
A cable buried behind finished trim is hard to inspect after a fault. Record photographs and the route in the RV's electrical file.
Why a warm connection matters
Resistance at a loose or poorly made termination can create heat even when the cable itself is correctly sized. A battery may still show plenty of charge while an inverter sees low voltage under load. Comparing voltage at the battery and inverter during a representative load can help locate a problem. Only a trained person should measure live high-current circuits.
Do not fix repeated inverter shutdowns by installing a larger fuse without diagnosing the cause. Protection is selected to protect the circuit, not to avoid nuisance symptoms. A BMS trip can reflect current, voltage, temperature or a wiring problem; read available warnings.
Routing changes when the bank moves
Moving a case indoors may improve access or temperature conditions, but it lengthens some runs and changes the location of the main protection. A battery in an exterior box may shorten the route to a trailer's existing fuse panel but expose connections to moisture. Compare both locations before deciding.
Secure the battery independently. Cables must not be the straps that hold it in place. Provide strain relief and plan enough slack for service without leaving loose loops that can chafe. Follow the case's mounting instructions and keep access to terminal covers.
Parallel batteries need balanced paths
Adding another case may increase energy and share current if the exact model allows parallel operation. It also adds interconnects. Cable lengths and busbar layout can affect how evenly the cases contribute. The manufacturer may prescribe matching state of charge before connection and specific wiring. Do not treat the second case as a simple extension cord.
When comparing lithium RV batteries, including RV lithium batteries from Epoch, check the exact model's permitted configuration, terminal arrangement and continuous output. The collection helps narrow candidates, but cable routing depends on the specific installation.
Finish with a test and a drawing
Before panels are closed, an installer should verify polarity, fuse and disconnect placement, cable support and torque according to component instructions. After commissioning, observe voltage and current under the largest ordinary load and during charging. Keep a dated wiring diagram and photographs for future service.
Inspect the route under realistic conditions
A cable may appear clear of moving parts while the RV is parked, yet rub against a slide mechanism or seat base in use. Follow the full path with the slide in both positions. Check suspension movement near the chassis and avoid routing where road debris can strike exposed wiring. At every metal pass-through, use the protection specified for the installation and secure the cable so the edge cannot bear its weight. Photograph hidden sections before panels are closed.
Heat matters as well. Keep runs away from exhaust components, heater ducts and locations where stored gear could trap the cable against a warm appliance. The installer should account for ambient temperature and how conductors are grouped when selecting cable and protection. A route that takes a longer, cooler path may need a different conductor size because of voltage drop.
Leave a traceable service path
Label each end with its destination, such as inverter positive, DC distribution or charging return. Record the cable length and size, fuse type and rating, and the location of the disconnect on a simple as-built diagram. The owner can then identify what should be isolated before a future repair. Keep that drawing in a dry place inside the RV as well as a digital copy.
If an old lead-acid bank is being replaced, resist reusing every cable solely because it already reaches. Inspect the insulation, lugs and crimps, and confirm the circuit's new current and protection requirements. Lithium RV batteries may supply sustained current differently from the previous bank. A neat cable route and an appropriate fuse are separate checks; both belong in the final inspection.
Coordinate the charging cables
Solar, alternator and shore charging may meet the bank at different locations. Make sure the return path passes through any monitoring shunt as designed, or the displayed state of charge may drift from reality. The charge controller's output should have its own appropriate protection. Note whether the battery disconnect isolates that controller, and follow its prescribed shutdown order. A cable map that includes only the inverter leaves half the system unexplained.
Ask for a final photograph of each concealed penetration. The photo should show the protective sleeve or grommet and a nearby reference point so a future owner can find it. If the cable runs below the floor, record its location before a later renovation adds screws through that area.
Conclusion
The safest route is one sized for current, protected from damage, restrained against motion and still accessible for service. Plan it before choosing the final battery location, then test the installed system under real use.