Let’s be honest: nothing kills the buzz of a breakthrough hardware design faster than receiving a quote for prototype PCBA services that looks like a down payment on a house. We’ve all been there—you’ve spent weeks perfecting your schematics, only to realize the assembly cost for just five boards is eating up half your project’s budget. It feels like a "speed tax" on innovation. But here’s the secret the big assembly houses won't always tell you: most of that cost isn't coming from the components or the labor—it's coming from design choices that make your board unnecessarily difficult to build.
Quick Summary: Optimizing Your Prototype PCBA Services Strategy
If you are in a rush to get your boards to the lab, here is the "too long; didn't read" version of how to optimize your prototype PCBA services for maximum affordability:
Standardize Parts: Stick to "Basic Parts" libraries to avoid line-change fees.
Simplify Layers: Keep your stack-up as simple as the signal integrity allows.
One-Sided Placement: Try to keep all SMT components on the top side.
Smart Panelization: Optimize board shape to minimize material waste.
Early DFM Checks: Catching a clearance issue now saves a $500 re-run later.
Why Is My Prototype PCBA Quote So High? Understanding the Hidden Drivers
Before we dive into the fixes, we need to address the "Why." When you search for prototype PCBA services, you aren't paying for mass production efficiency; you’re paying for the setup.
The cost of a prototype run is heavily weighted toward NRE (Non-Recurring Engineering) fees. This includes programming the pick-and-place machines, creating stencils, and manual inspections. If your design requires a unique setup for a single $0.10 resistor, you’re not paying for the resistor—you’re paying for the 20 minutes a technician spends calibrating the machine for it.
How Can I Design My Board to Be "Assembly-Friendly"? (5 DFM Tips)
User intent usually boils down to: "Tell me exactly what to change on my PCB layout to save money." Here are the 5 most impactful DFM (Design for Manufacturability) strategies.
1. Consolidate Your Bill of Materials (BOM)
One of the fastest ways to spike the price of prototype PCBA services is having 50 different line items for a board with only 60 components.
The Fix: Use the same 10k ohm resistor (same package size) throughout the board. If you can replace a 4.7k and a 5.1k with two 4.9k resistors (if tolerances allow), do it. Fewer unique parts mean fewer "feeder" setups on the SMT line.
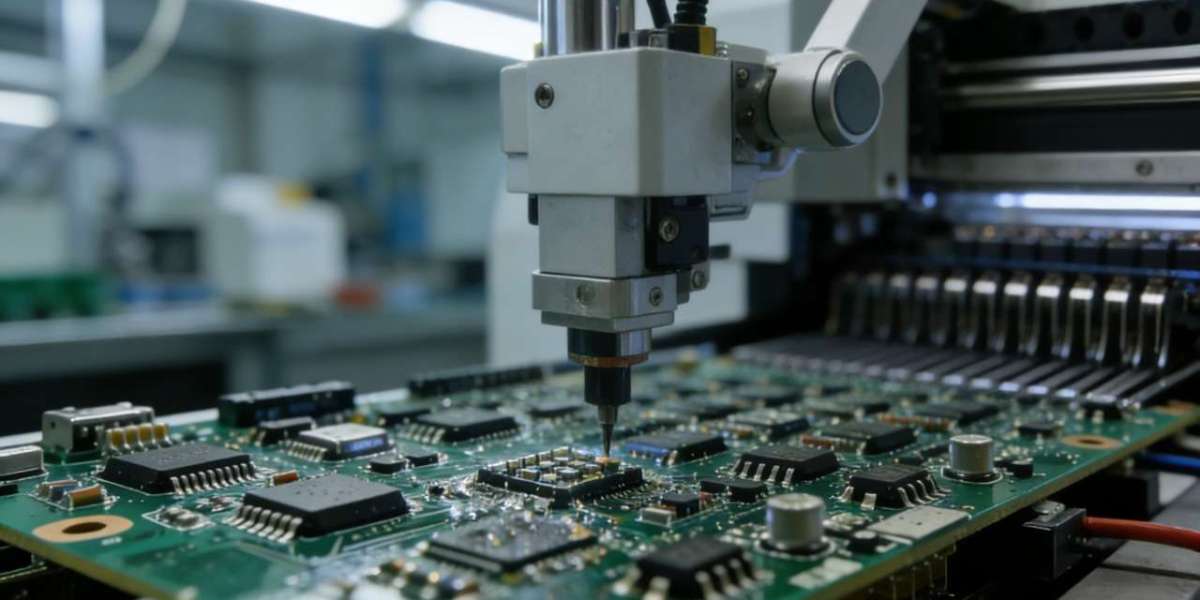
2. Stick to One-Sided SMT Assembly
Every time a board has components on both sides, it has to go through the reflow oven twice. This literally doubles the labor and setup for the assembly phase.
The Fix: If you have the real estate, move all surface-mount components to the top side. Even if it makes the board 10% larger, the savings on prototype PCBA service labor will far outweigh the extra cost of the raw PCB FR4 material.
3. Avoid "Exotic" Components and Ultra-Fine Pitch if Possible
While 01005 components and 0.3mm pitch BGAs are impressive, they require specialized high-precision equipment and 3D X-ray inspection.
The Fix: Unless your device is a wearable the size of a coin, stick to 0402 or 0603 packages. They are easier to source, cheaper to mount, and have a much higher first-pass yield during the prototype phase.
4. Optimize Your Via Design
Tented vias, vias-in-pad, and blind/buried vias look great on a CAD tool but are nightmares for budget-conscious production. Vias-in-pad, specifically, require plugging and plating to prevent solder from wicking away from the component pad.
The Fix: Use standard through-hole vias whenever possible. If you must use via-in-pad for thermal management, be prepared for the added cost of the "PoP" (Plated over Plug) process.
5. Use Standard Board Geometries and Materials
Choosing a non-standard thickness (like 2.0mm instead of 1.6mm) or an exotic high-frequency substrate (like Rogers) when standard FR4 would suffice can triple your raw board cost.
The Fix: Stick to the "Standard" pool at your fab house. This allows them to "panelize" your board with other customers' designs, sharing the setup cost.
Comparison: Low-Cost vs. High-Complexity Prototype Design
| Feature | Budget-Friendly Design | High-Cost Design |
| Component Placement | Single-sided SMT | Double-sided SMT + Through-hole |
| Minimum Component Size | 0603 or 0402 | 0201 or 01005 |
| BOM Uniqueness | 15 Unique Line Items | 45 Unique Line Items |
| Via Type | Standard Through-hole | Blind/Buried Vias |
| Lead Time Impact | 3-5 Days | 10-15 Days |
Bridging the Gap: From Design to Reality with SanShun Smart
You’ve done the hard work of optimizing your DFM. Now, you need a partner who actually respects your budget and timeline. This is where SanShun Smart steps in.
Transitioning from a digital design to a physical prototype shouldn't feel like a gamble. At SanShun Smart, we specialize in bridging that "valley of death" between a finished Gerber file and a working prototype. With a focus on Smart Manufacturing, our facilities are designed specifically to handle the high-mix, low-volume demands of modern hardware startups and engineering firms.
What sets SanShun Smart apart is our proactive DFM feedback. We don't just take your money and build a failing board; our engineers review your files to suggest the very cost-saving measures we discussed above. Whether you need a quick-turn prototype PCBA service run or a small batch for beta testing, we provide the transparency and "one-stop" convenience that engineers crave.
Your Next Step to a Better Prototype
Reducing the cost of your hardware shouldn't mean sacrificing the quality of your innovation. By implementing these 5 DFM tips, you are not just saving money—you are creating a more robust, manufacturable product that will be easier to scale in the future.
Ready to see how much you can save on your next project? [Contact SanShun Smart today for a free DFM review and a transparent quote on our Prototype PCBA Services. Let’s build something amazing together.]
Frequently Asked Questions About Prototype PCBA Services
Q1: Why is the "Setup Fee" so high for just 5 boards?
In prototype PCBA services, the setup fee covers the time spent by engineers to program the pick-and-place machines, create the laser-cut SMT stencil, and prepare the feeders. This labor is the same whether you build 1 board or 1,000. To reduce this, try to use "Turnkey" services where the provider manages the BOM to streamline the process.
Q2: How can I ensure my prototype works on the first try?
Beyond DFM, always request AOI (Automated Optical Inspection) and, if you have BGAs, X-Ray inspection. While these add a small fee to your prototype PCBA services, they are much cheaper than diagnosing a short circuit under a chip manually or re-ordering the entire batch.
Q3: Does "Turnkey" service save money or cost more?
Usually, it saves money. While you might think buying parts yourself is cheaper, the shipping costs from five different vendors (Digikey, Mouser, Arrow, etc.) add up. A Turnkey provider like SanShun Smart leverages bulk accounts and consolidated shipping to keep costs down.
Q4: What is the ideal lead time for a cheap prototype?
Standard "Economy" lead times are usually 10-15 days. If you need "Express" (24-48 hours), expect to pay a premium. The best way to save is to plan your design cycle so you can afford the standard shipping window.